Want to set up an Octopia integration with Zendesk, Freshdesk, Onsite Support, Re:amaze, Zoho Desk, or Kustomer? With ChannelReply, you'll be done in minutes! Just follow the steps below.
Compatibility Notes
This integration has been thoroughly tested with Cdiscount. It should also be possible to connect stores from any other seller account created via Octopia. This includes Kingfisher, Castorama, Empik, Darty, Worten Portugal, Rakuten France, Praxis, Vertbaudet France, Brico.be, Brico Depôt Spain and Portugal, Alltricks France, Perfume’s Club Spain, Marjane Maroc, Rue du Commerce France, Bebeboutik, Europazon, and Alizeade.
If you use this process to connect any marketplace other than Cdiscount, please contact us. Our developers will review your connection to make sure everything works as expected and adjust our app if needed.
Note: Our Octopia integration is not available for Gorgias or Help Scout at this time.
1. Get Ready
If You Already Have a ChannelReply Account
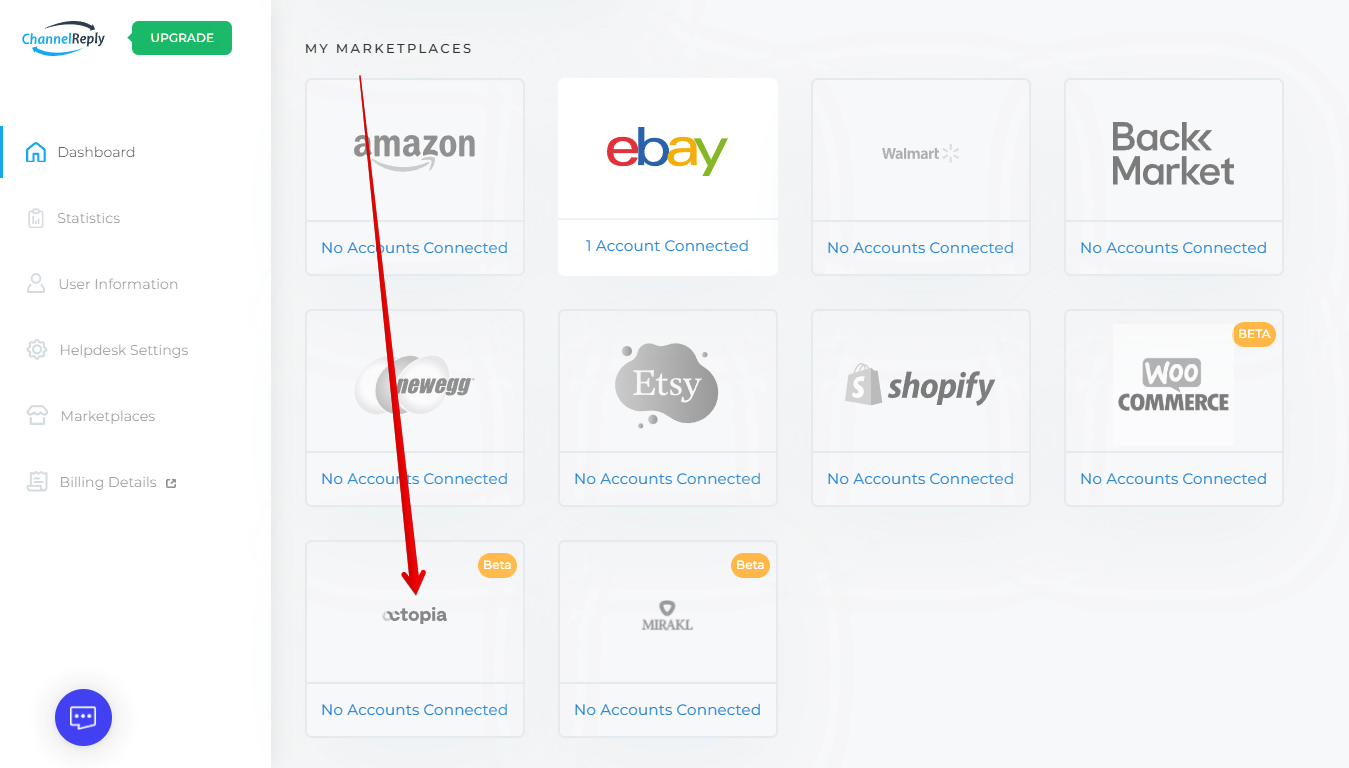
Log in to ChannelReply using Threecolts. Scroll down to “MY MARKETPLACES” on your dashboard, then click on Octopia.
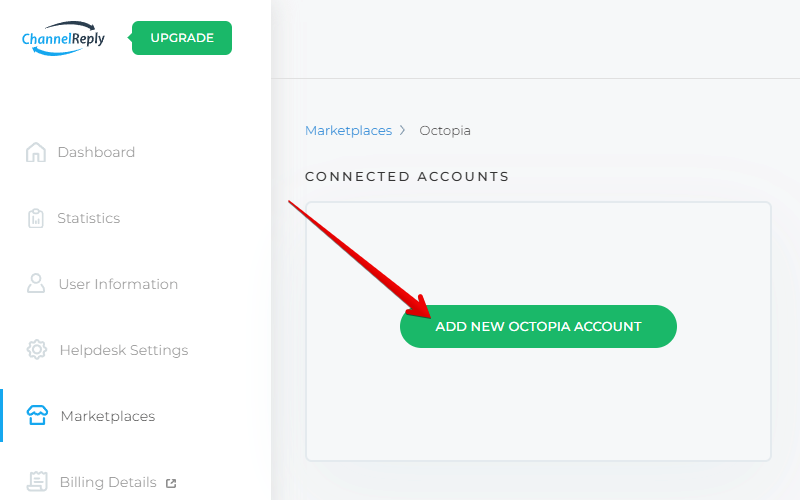
On the next screen, click “ADD NEW OCTOPIA ACCOUNT.”
If You Don’t Have a ChannelReply Account
Start your free 14-day trial of ChannelReply through Threecolts. Integrate Zendesk, Freshdesk, Onsite Support, Zoho Desk, Re:amaze, or Kustomer when prompted.
Note: Still need to choose a helpdesk? ChannelReply is included free with Onsite Support! You can also get help in our guide to choosing an ecommerce helpdesk.
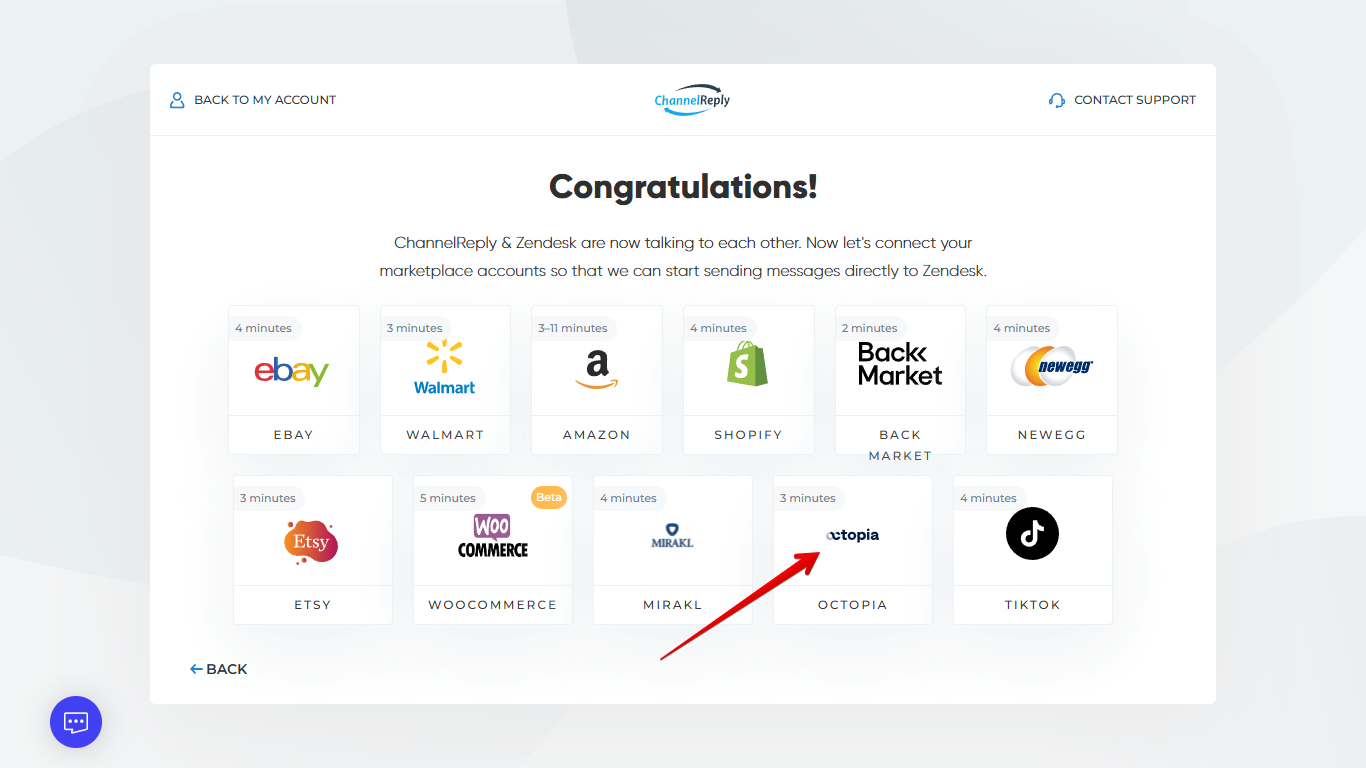
When you’ve finished connecting your helpdesk, you’ll see a screen like the one below. Select Octopia from the list of available integrations.
If you've already left the initial setup, no problem. Go to your ChannelReply dashboard, then scroll down to “MY MARKETPLACES” and select Octopia.
Finally, hit "ADD NEW OCTOPIA ACCOUNT.”
2. Integrate ChannelReply with Octopia
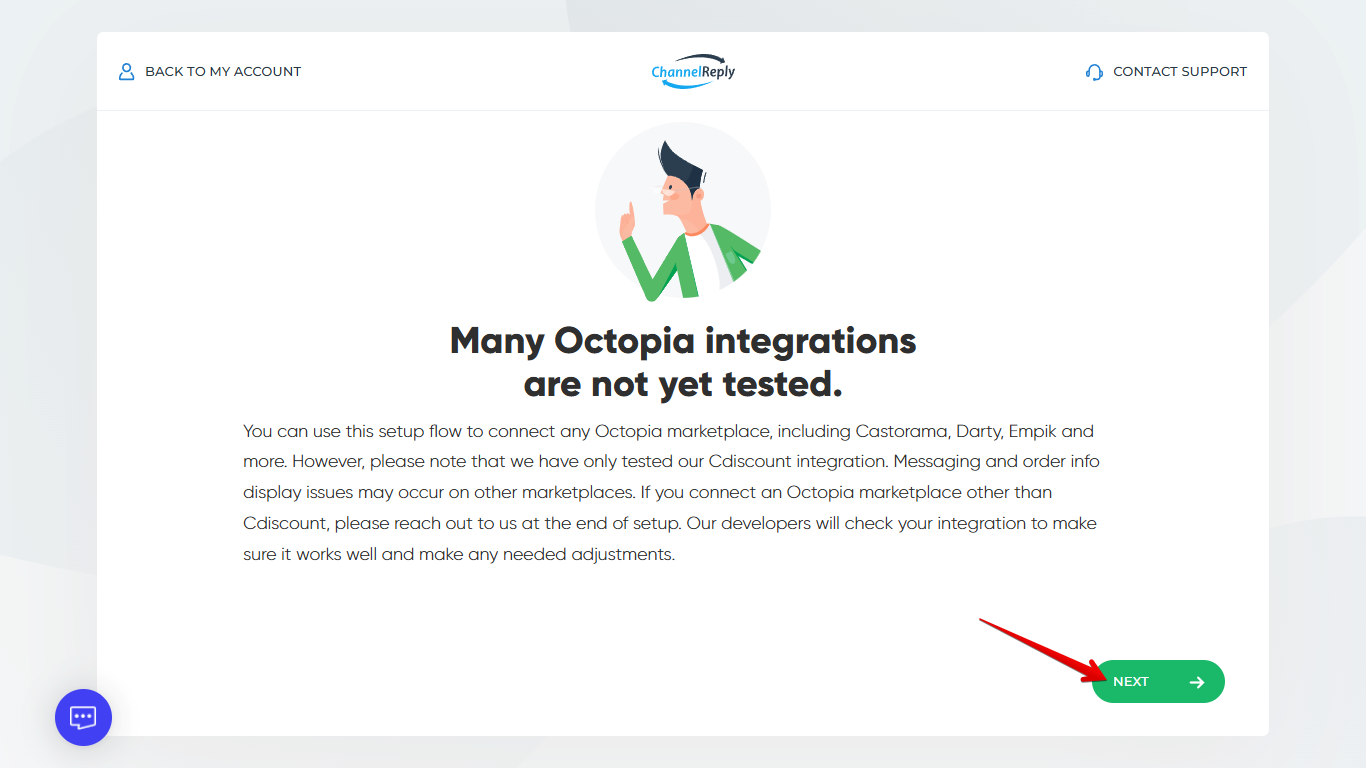
You’ll arrive on the notice screen shown below. We’ve already covered this above, so you can just click “NEXT.”
The next screen provides detailed instructions on how to connect with Octopia.
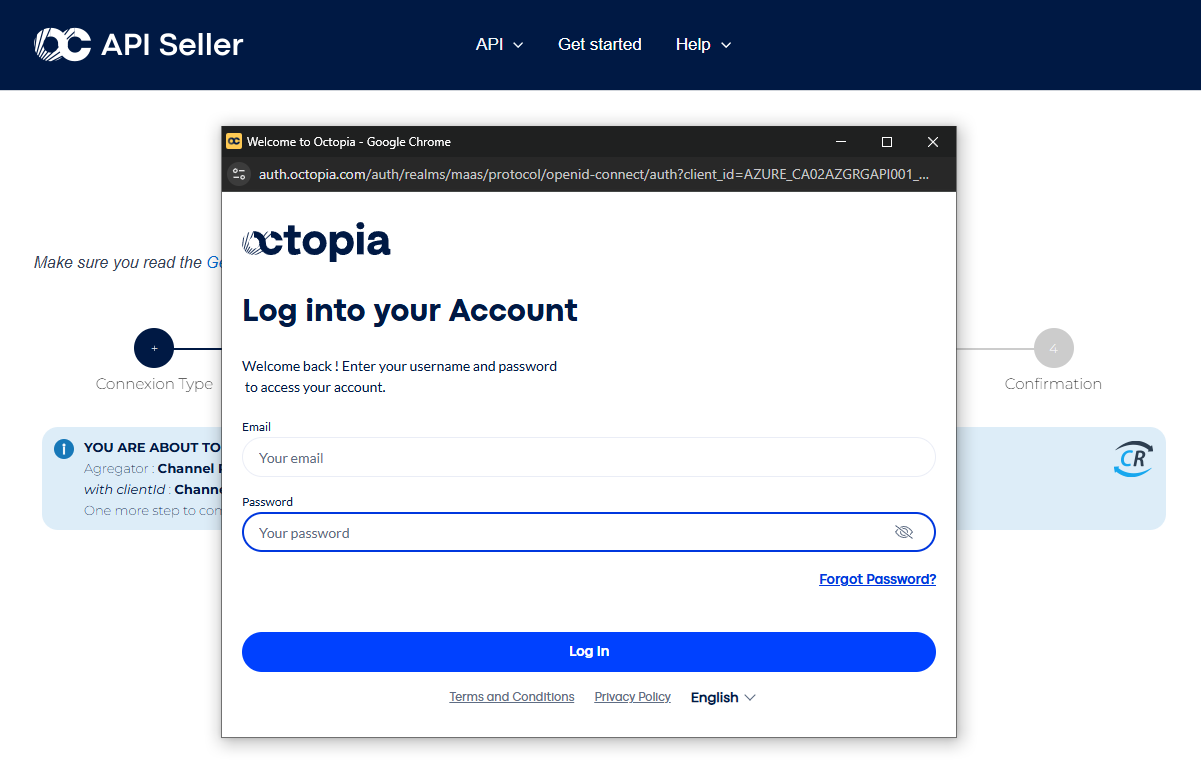
Before getting started, make sure you’re either logged out of your seller accounts or only logged in to Octopia as the one you would like to integrate. That way, you can be sure you won’t accidentally connect the wrong account.
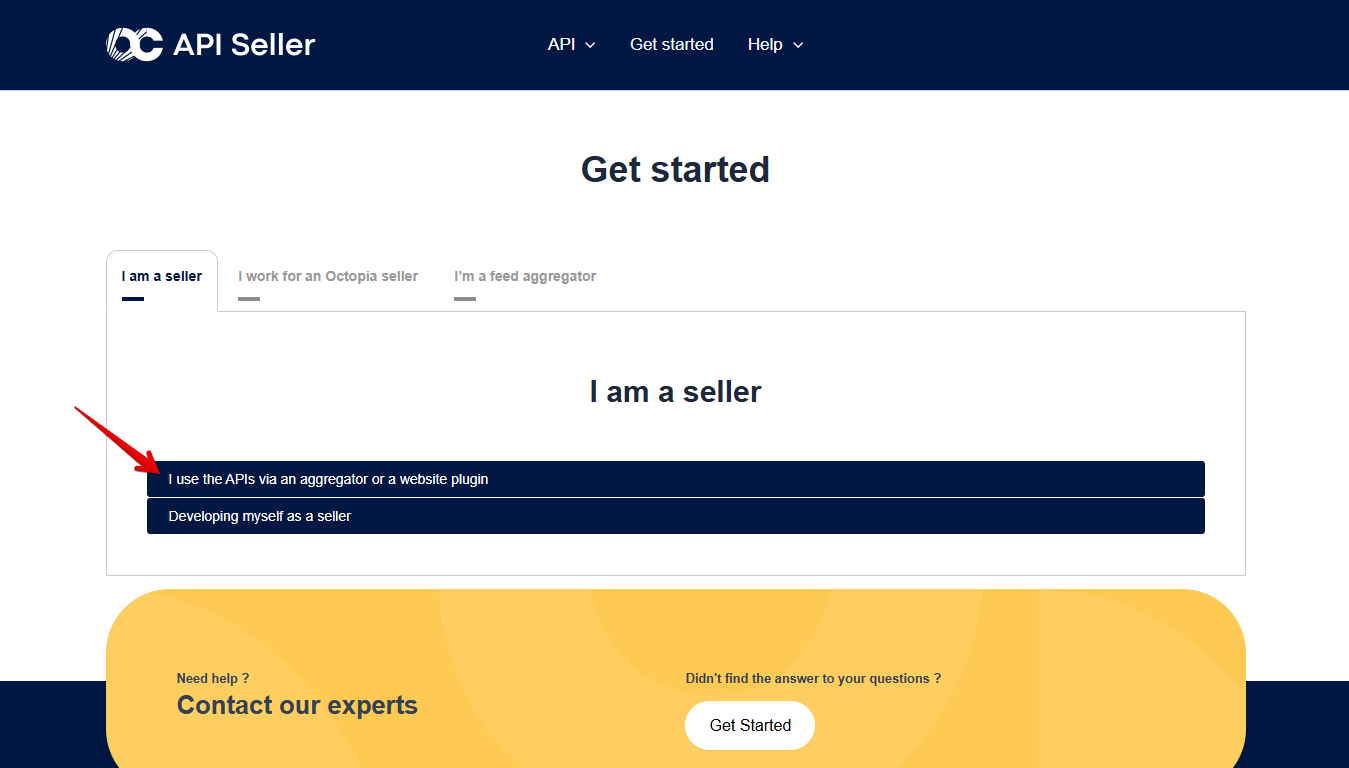
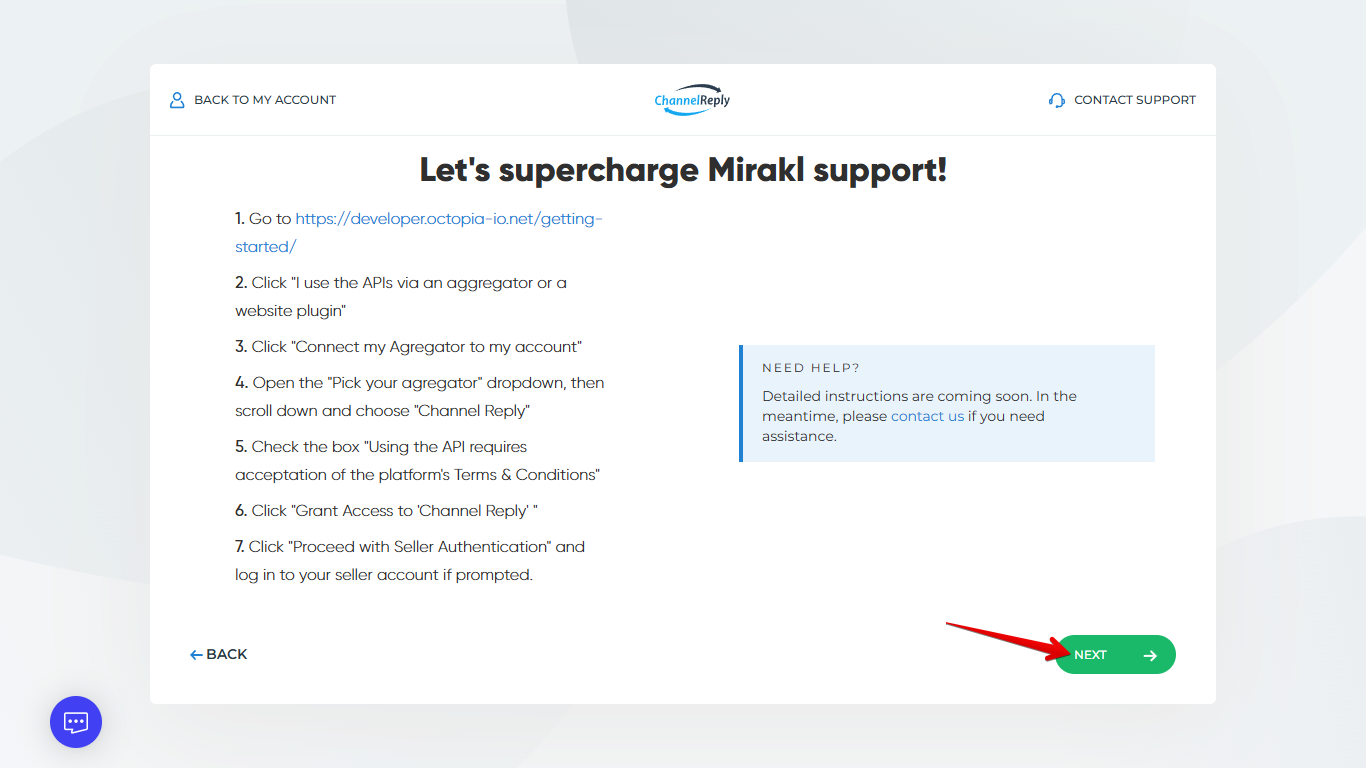
When ready, follow this link to Octopia’s “Get started” screen. Click “I use the APIs via an aggregator or a website plugin.”
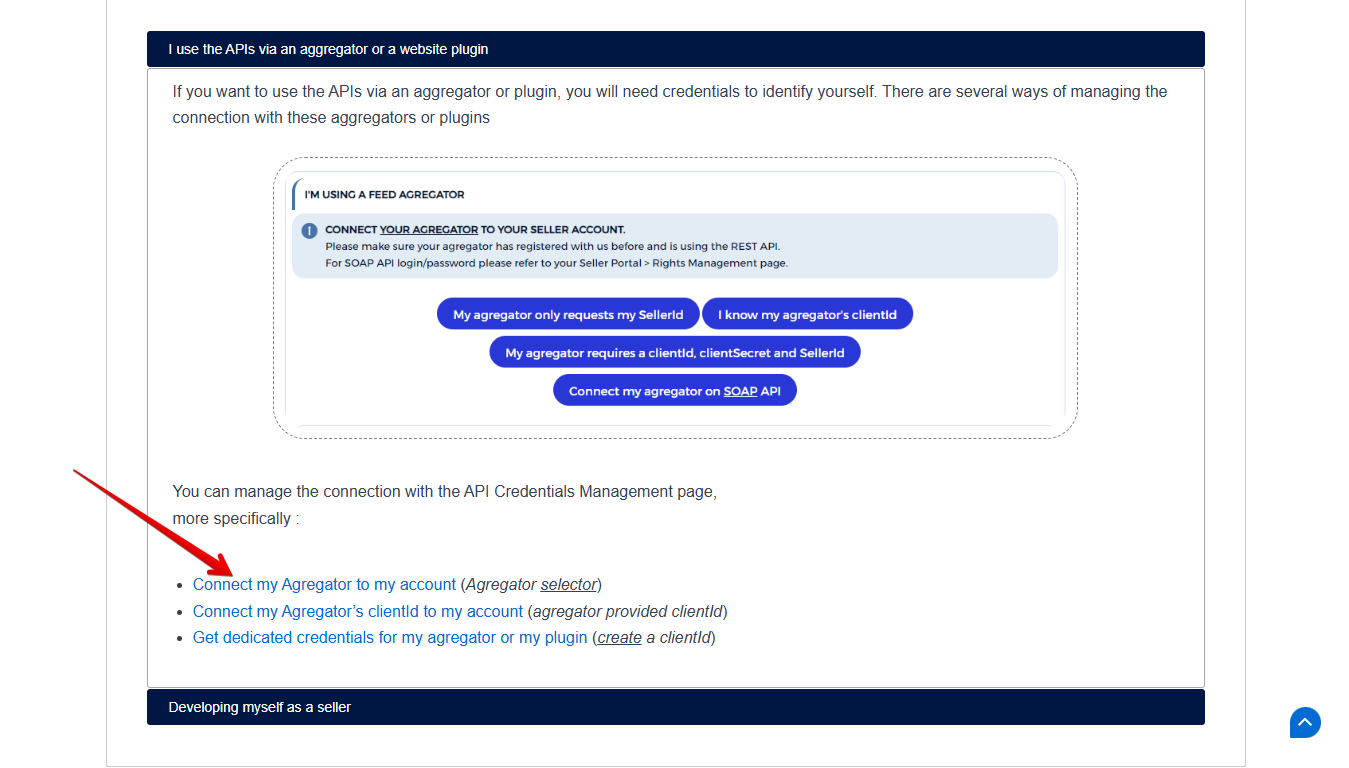
Click “Connect my Agregator to my account.”
Open the “Pick your agregator” dropdown and select “Channel Reply” (two words) from the list. You can search to find us faster.
Check the box next to “Using the API requires acceptation of the platforms Terms & Conditions.” (Note that this refers to Octopia’s terms and conditions, so be sure to follow the link and review them if you haven’t yet.) Then click “Grant access to ‘Channel Reply.’ ”
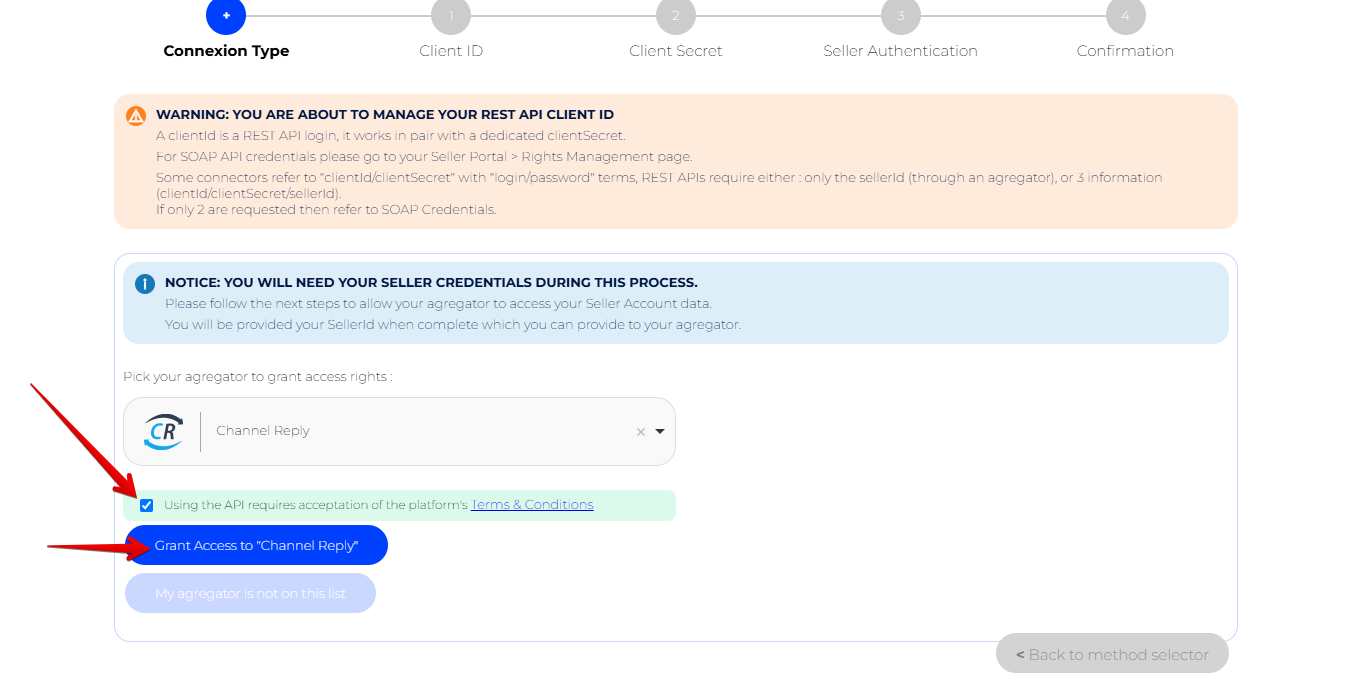
On the next screen, hit “Proceed with seller authentication.”
If you aren’t logged in to your seller account already, you’ll be prompted to sign in now. Be sure to log in as the seller account you want to connect to ChannelReply.
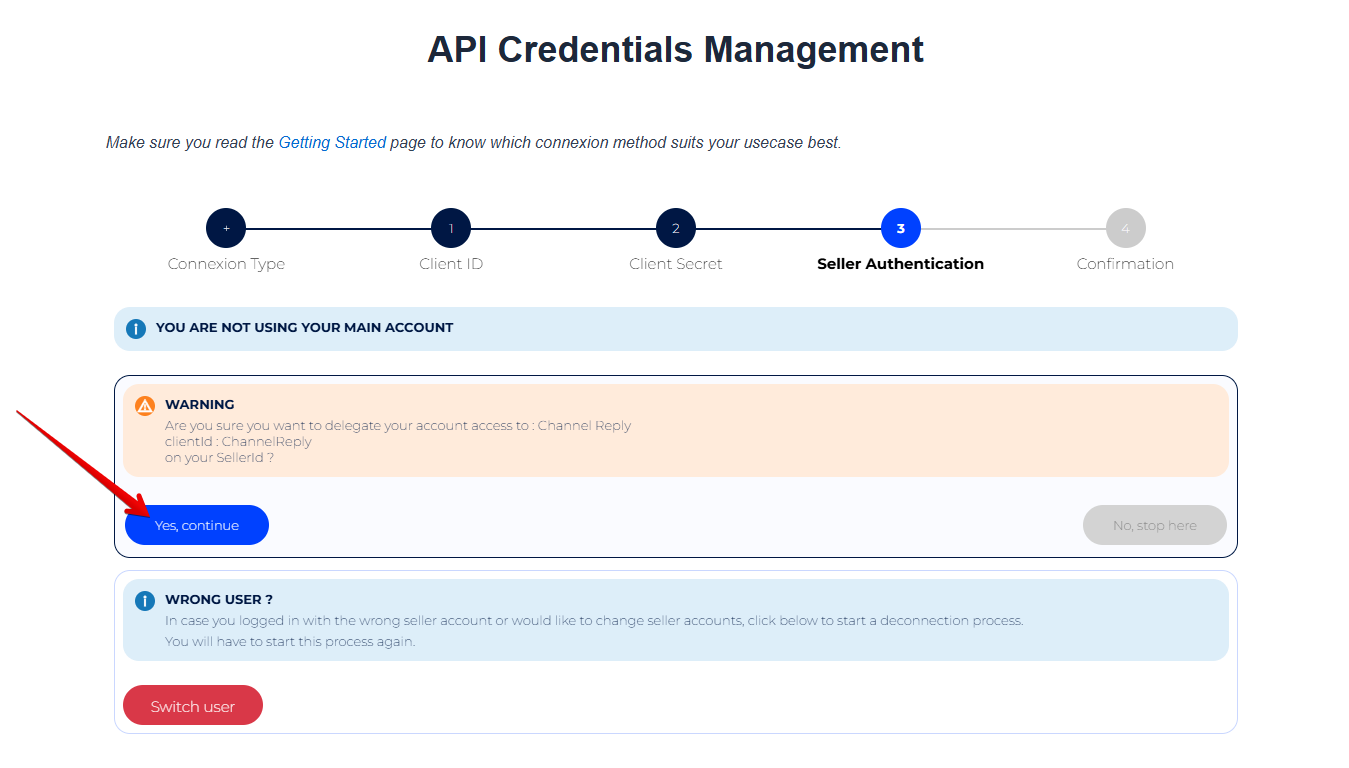
In ChannelReply, click “NEXT.”
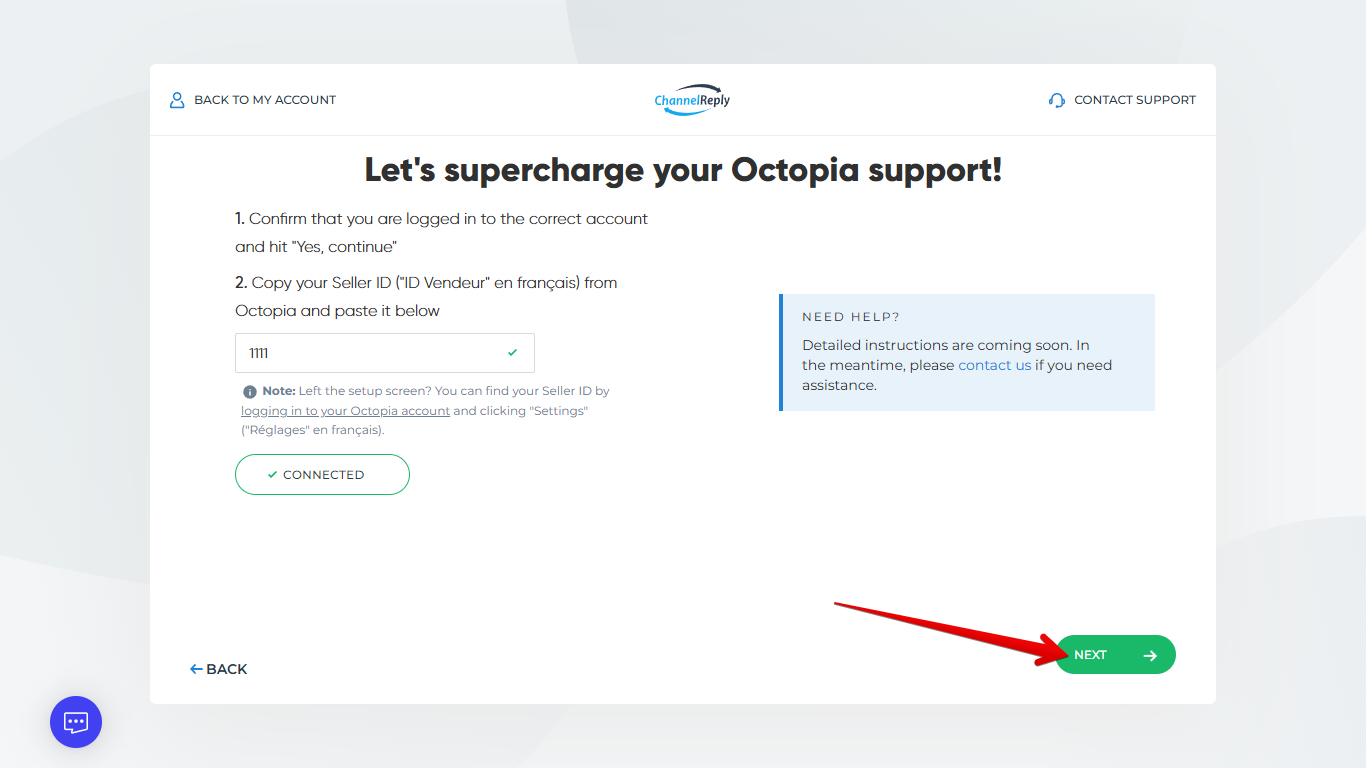
In Octopia, you will be given a chance to confirm that you’re logged in to the correct seller account. If everything looks good, click “Yes, continue.”
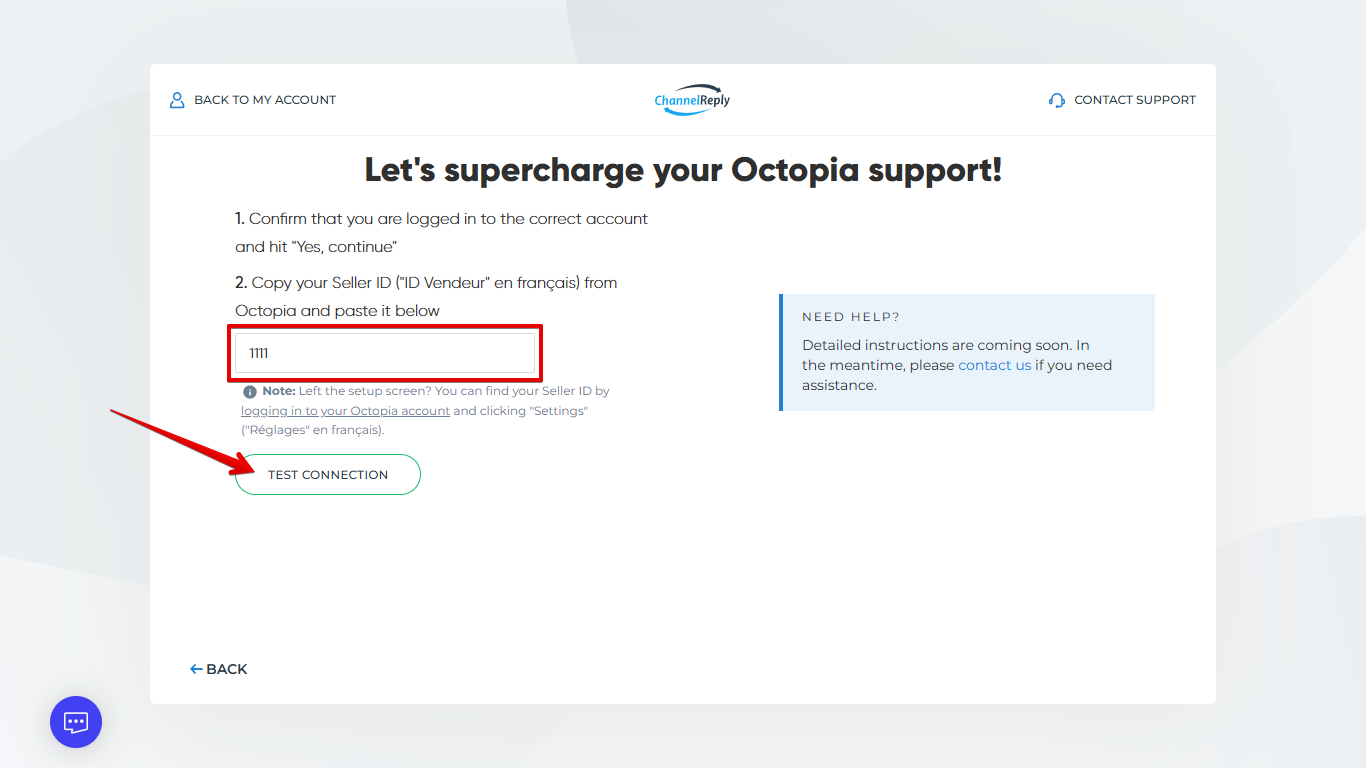
The next screen will display your Seller ID (“ID Vendeur” en français). Copy your ID and paste it into the Octopia Seller ID field in ChannelReply. Then click “TEST CONNECTION.”
Note: Another way to find your Seller ID is to log in to Octopia and click “Settings” ("Réglages" en francais).
If the integration is successful, “TEST CONNECTION” will change to “CONNECTED” and a green “NEXT” Button will appear in the lower right. The integration is complete and saved to your ChannelReply account! Click that new “NEXT” button to continue.
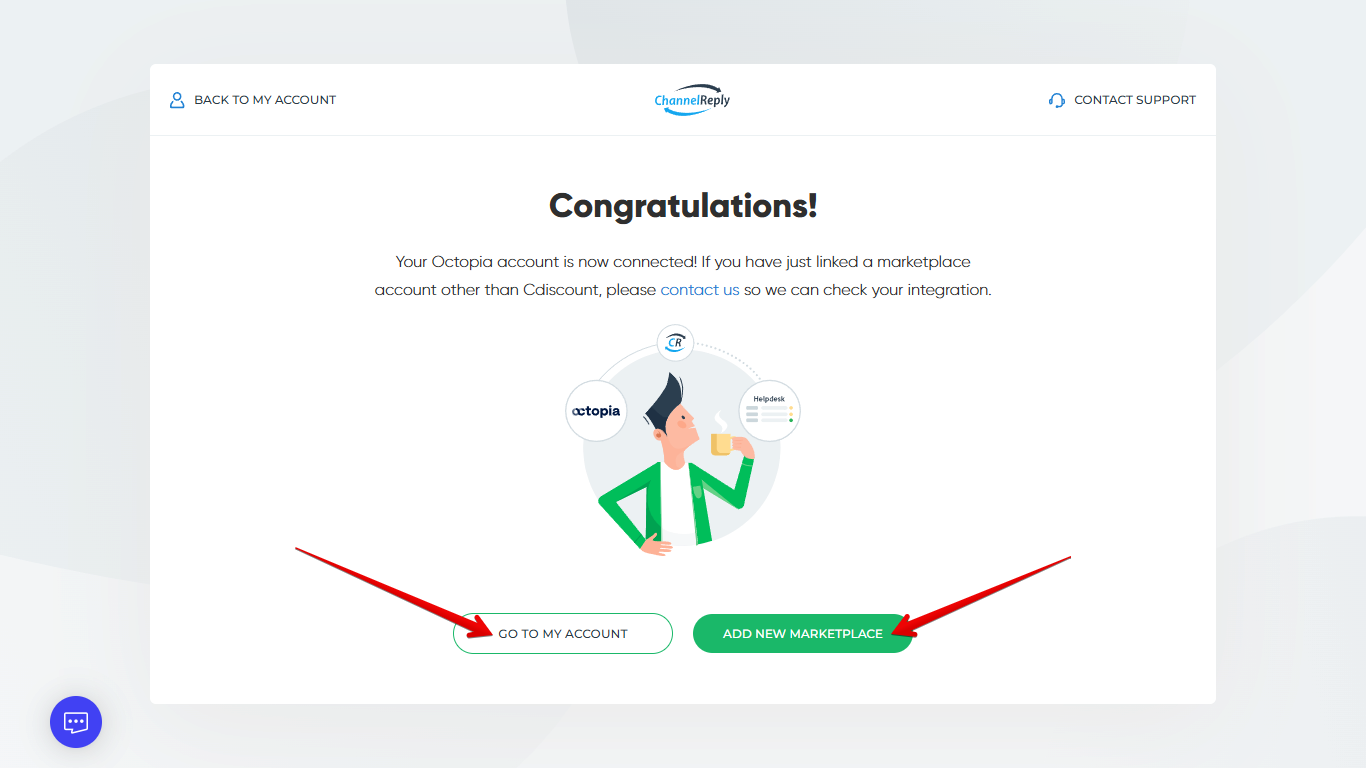
You’ll see a reminder on this screen to contact us if you’ve connected any Octopia channel other than Cdiscount. If you’ve just pioneered a new marketplace, please reach out! We’ll make sure there are no surprise issues so it runs smoothly for you and for any future customers who connect the same channel.
Click “GO TO MY ACCOUNT” if you’re ready to return to your dashboard. If you want to connect more accounts from Octopia or other marketplaces, click “ADD NEW MARKETPLACE” instead.
3. Configure Additional Settings (Optional)
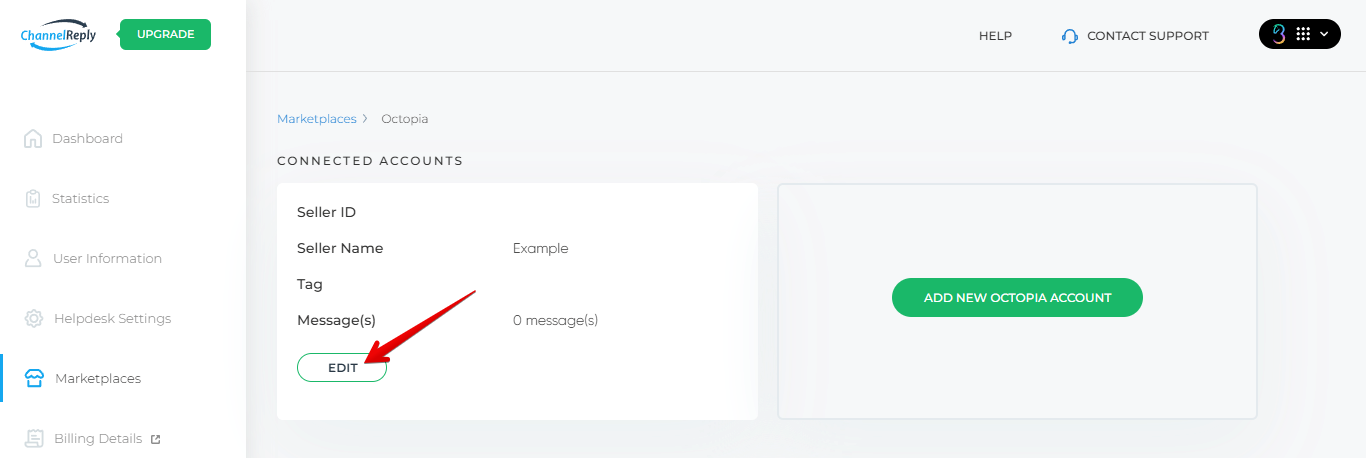
On your ChannelReply dashboard, click on the Octopia tile.
This screen will show you all your connected Octopia accounts. Hit “EDIT” under the one you’d like to work on.
You will then see your additional settings.
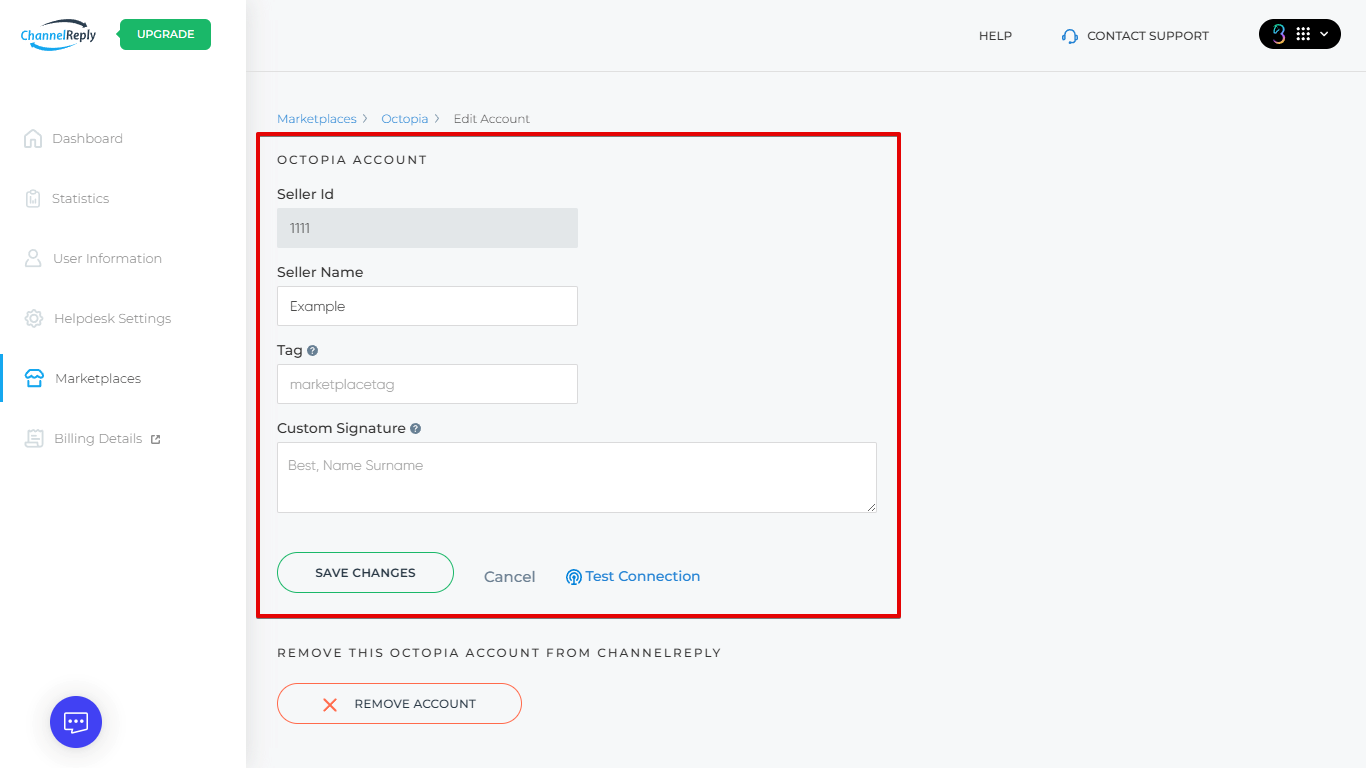
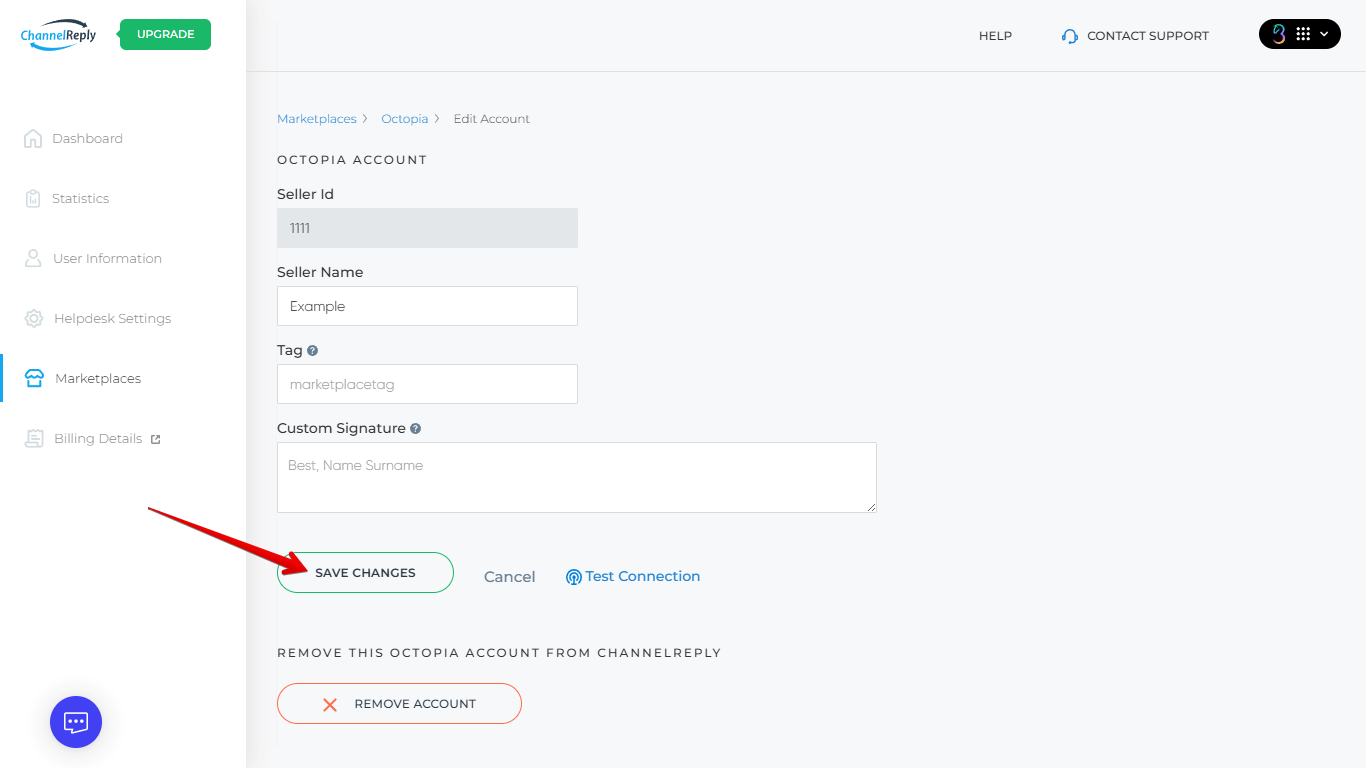
Octopia Account
All of the additional settings for your Octopia account are available here. Please note that changes made in this section do not save automatically. Be sure to click “SAVE CHANGES” if you make any edits.
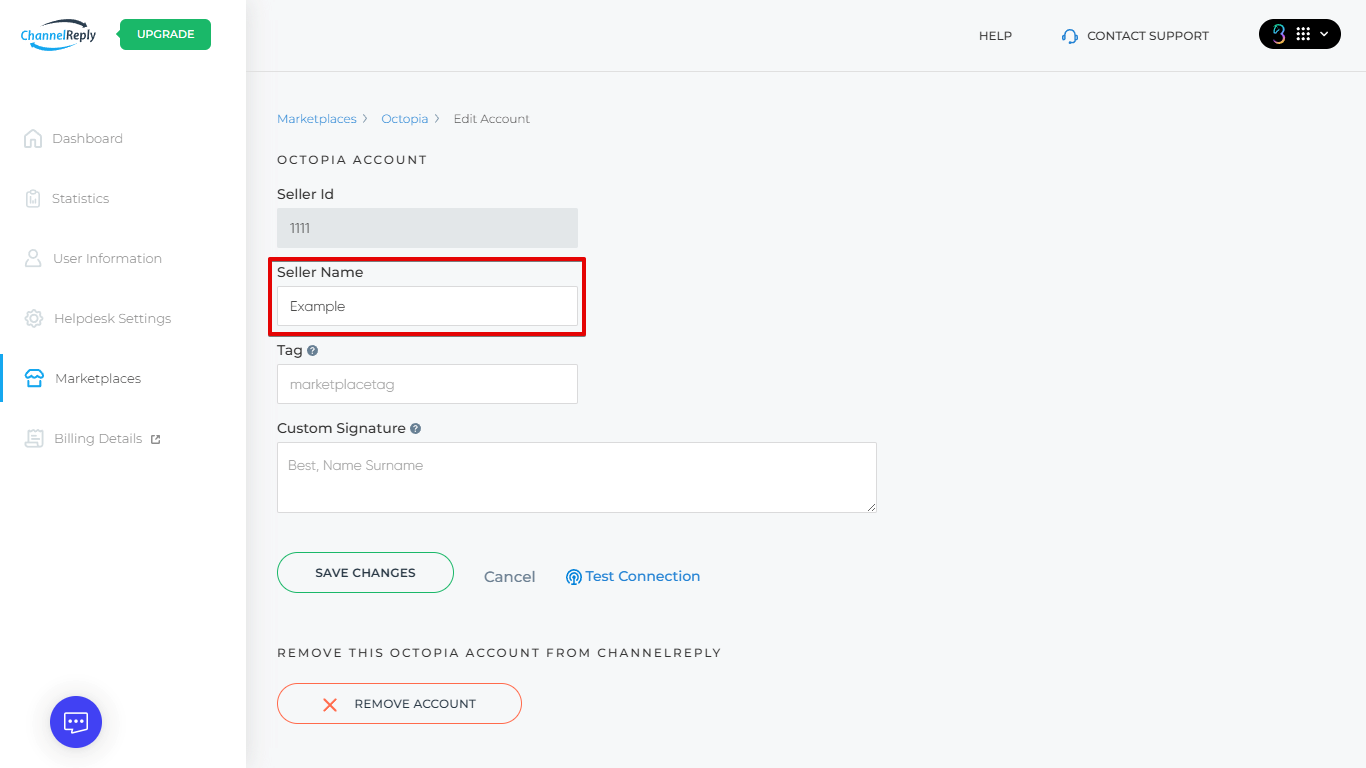
Seller Name
You should see your seller name in this field automatically. If it hasn’t appeared, or if you’ve changed your seller name, you can manually enter or edit it as desired.
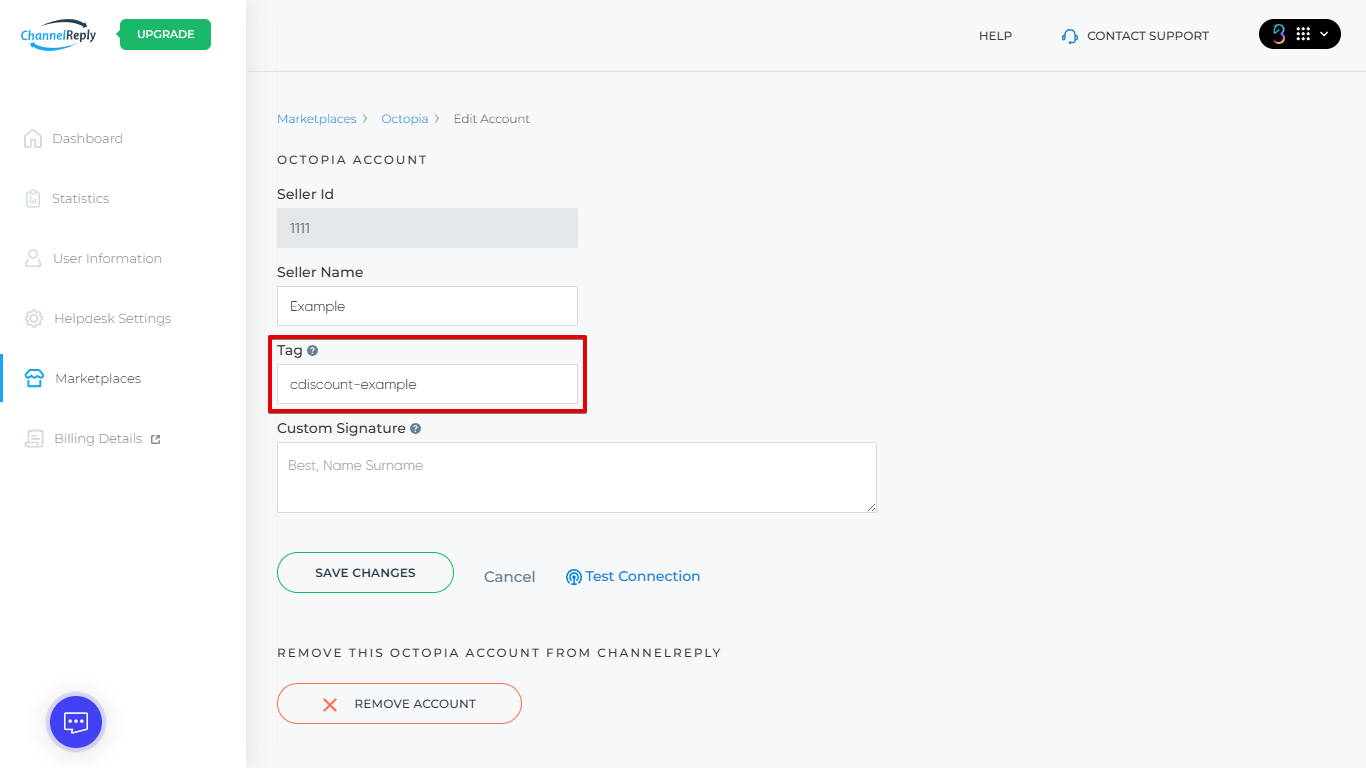
Tag
We recommend that all ChannelReply users set up tags. The tag you enter here will identify all tickets that come from this specific Octopia seller account in your helpdesk.
One good way to create a unique and helpful tag is to combine your seller name and marketplace name. Just keep in mind that any spaces will create a second tag. Use hyphens or underscores (e.g. cdiscount-mybrand or cdiscount_mybrand) to connect words into one tag.
Tags are helpful in more ways than you might think, from filtering tickets to creating autoresponders. See our guide to ChannelReply tags to learn more.
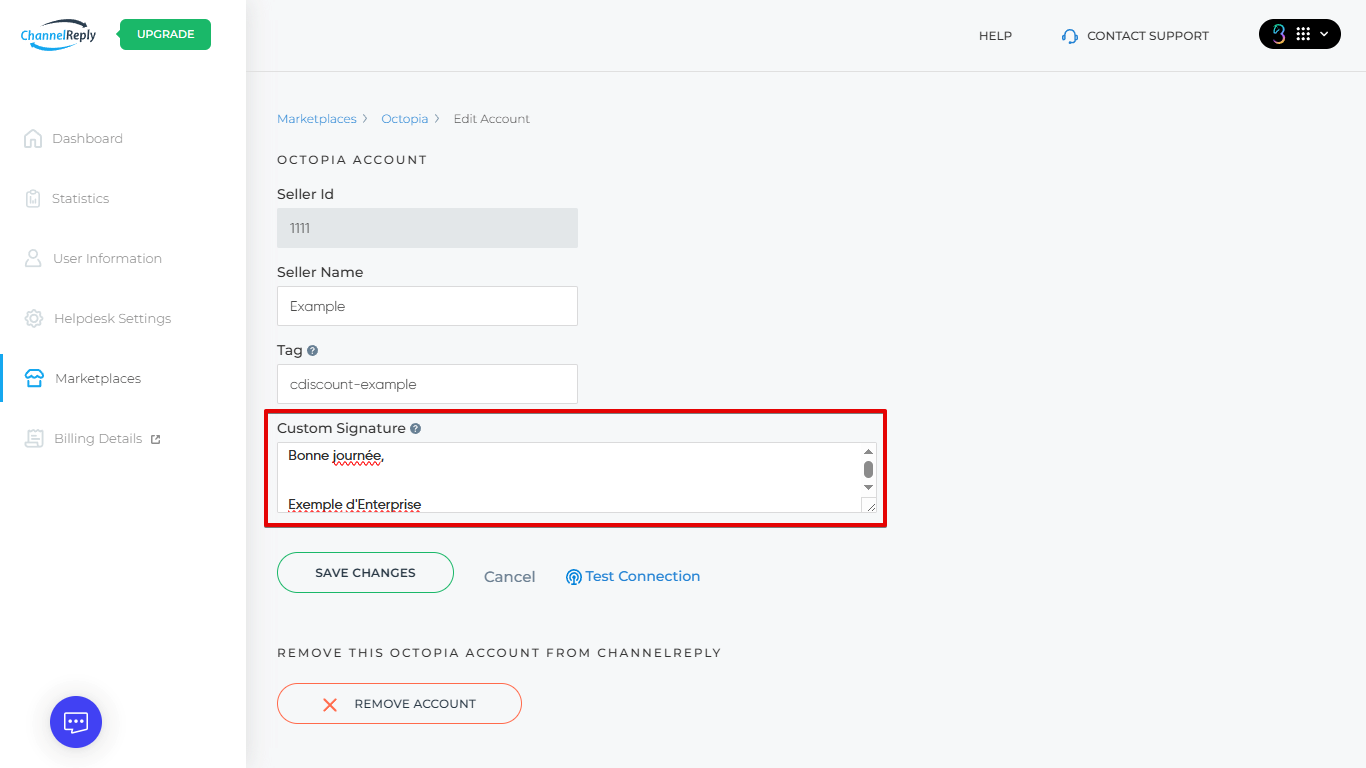
Custom Signature
Use this field to add a signature to every response you send to customers from this marketplace. This will appear at the very end of the message. If you already have a signature in your helpdesk, this will appear right after that.
This field is great for setting up unique signatures for accounts with different brand names or languages. For example, you might want a French signature for your Cdiscount account and a Polish signature for Empik.
Be careful to review each marketplace’s communication guidelines so you can stay out of trouble. For example, it’s very common for external links to be forbidden.
If you’re good at following the rules but worried about your team complying, consider using our text remover. This will set ChannelReply to delete any unwanted text from any replies it delivers to your customers.
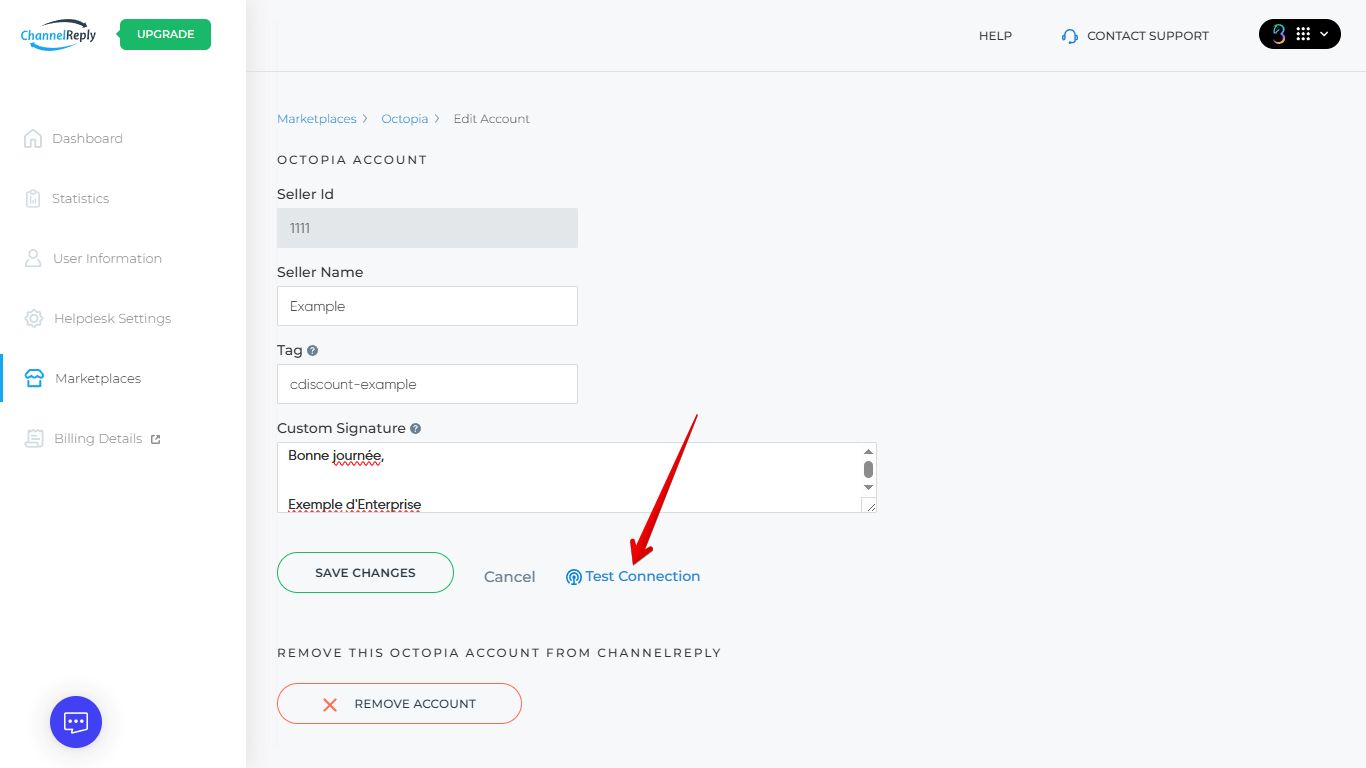
Test Connection
Click this button anytime to check if your integration is still working.
If you ever get a failed connection, you can contact us for help. Alternatively, you can remove the account as shown below, then reconnect it by following this article from the beginning.
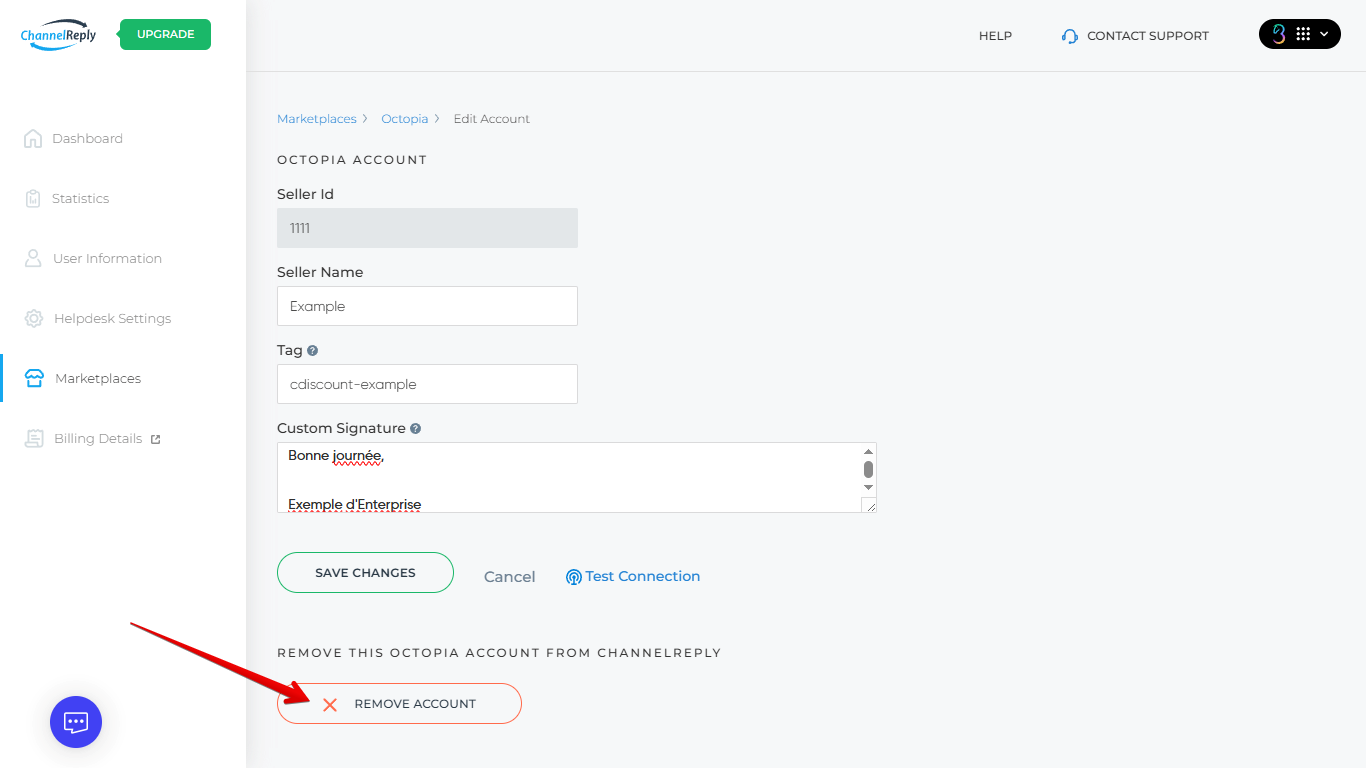
Remove This Octopia Account from ChannelReply
To disconnect your Octopia account, click “REMOVE ACCOUNT” at the bottom of the screen.
You will see a warning asking you to confirm your decision. Click “CONFIRM” to continue.
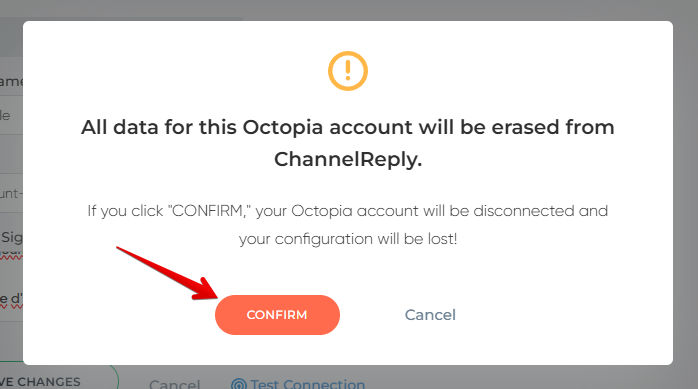
When the account is removed, all associated data will be deleted from ChannelReply’s records. Order info will no longer appear on tickets from this Octopia account in your helpdesk.
Adding More than One Octopia Account to ChannelReply
Now that you’ve finished adding one account, you can add as many more as you’d like! All you have to do is follow these instructions from the beginning.
Need help? Want tips on getting more out of your Octopia integration? Contact us and our team will be happy to assist you.